
Hardware Guidelines
| Hardware Platform | Basic Appliance | Standard Appliance | High-End Appliance |
|---|---|---|---|
| CPU | 8 vCPU (2.4 GHz core) | 16 vCPU (2.4 GHz core) | 20 vCPU (2.4 GHz core) |
| RAM | 24 GB | 48 GB | 64 GB 1 |
| HDD | 500 GB | 500 GB | 1 TB |
Downloading the Cisco MSE OVA File
- Download the Cisco MSE image from Download Software on cisco.com.
- Save the Cisco MSE OVA installer to your computer and ensure that it is accessible
Deploying the Cisco MSE OVA File Using the VMware vSphere Client
To deploy the Cisco MSE OVA file using the VMware VSphere Client, follow these steps:
- Launch the VMware vSphere client application on your desktop.
- From the VMware vSphere Client application menu, choose File > Deploy OVF Template.
- In the Deploy OVF Template window that is displayed, click Browse and select the Cisco MSE OVA file that is stored locally on the machine.

- Verify the OVF Template Details details, and click Next.

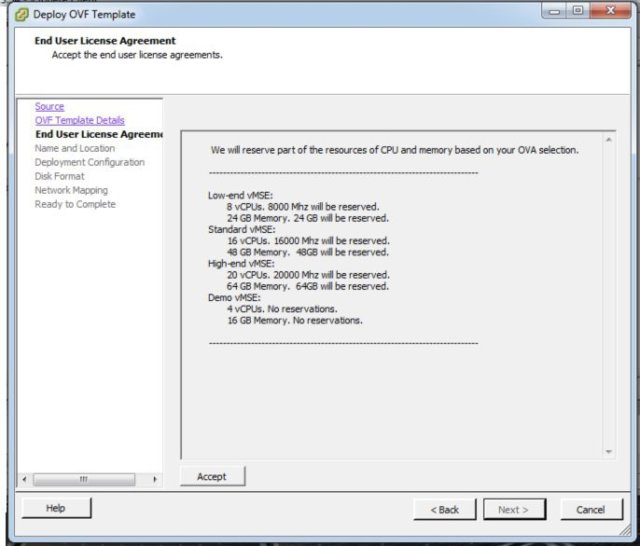
- Click Accept to accept the End User License Agreement and then click Next.
-
Enter a name for the Cisco MSE VM and click Next.

- From the Configuration drop-down list, choose the VM configuration of your choice.

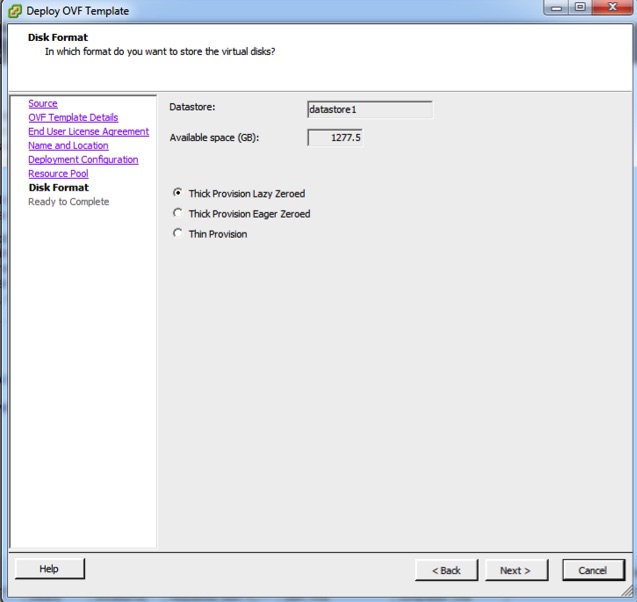
- Check the format in which you want to store the virtual disk
- Map the networks used in the OVF template to the networks in your directory

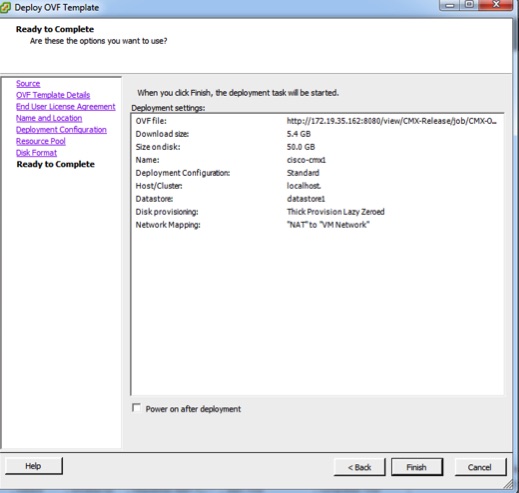
- Click Finish. Ensure that Power On the Virtual Machine is not checked.
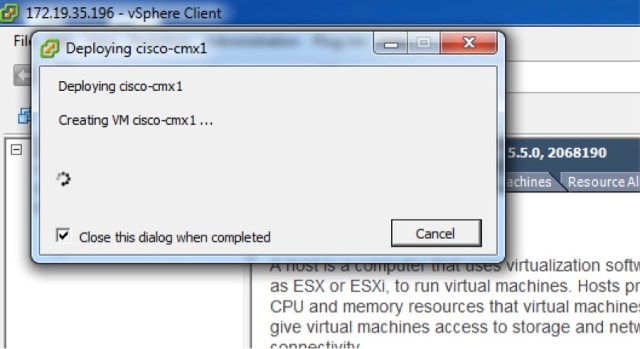
- Wait for the deployment to complete. This will take a few minutes
- Click the deployed VM and choose Edit Virtual Machine.
- (Optional)Click Hard disk and modify the Provisioned Size as per your requirement and capacity

-
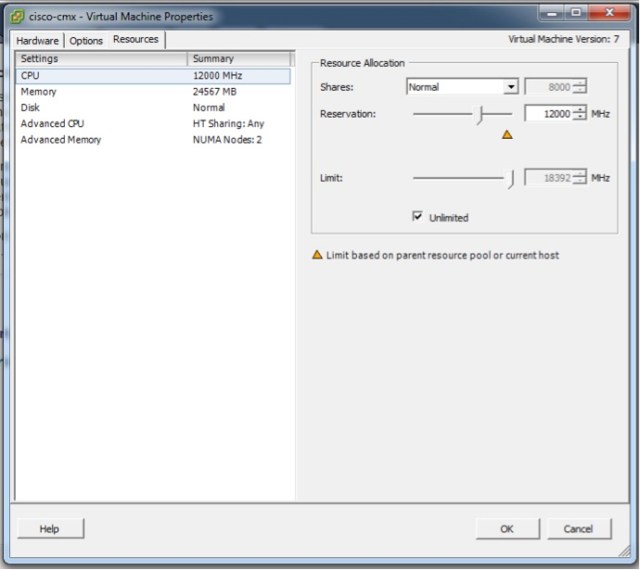
(Optional)Click Resources>CPU and modify the reservations if your OVA fails to start because of insufficient resources
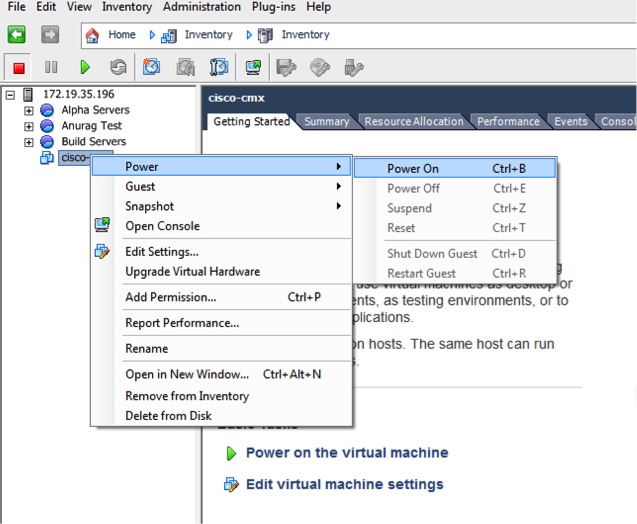
- Power ON the VM. The first boot takes a while as the new disk has to be expanded.
Installing a Cisco MSE Virtual Appliance
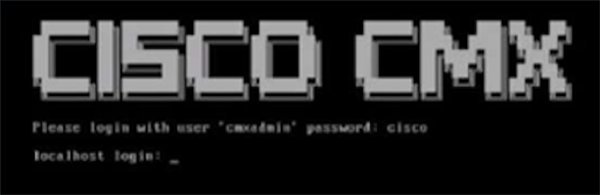
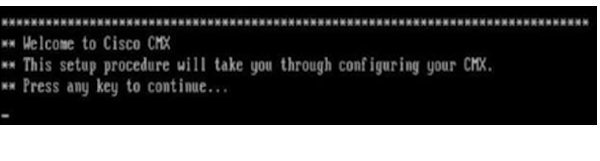
- Right-click the Cisco MSE VM and click Open Console. The console window is displayed with the following information

-
Enter the login name (cmxadmin) and password (cisco) as prompted.
- Press Enter when prompted, as shown in the figure below:
- Enter a new password for the root user and reconfirm it when prompted. The password should meet the minimum requirements listed. NOTE: The root password is used only for root operating system configuration and not for the cmxadmin user functions
- Enter a new password for cmxadmin user and reconfirm it. The password should meet the minimum requirements listed. NOTE: The cmxadmin password is used for logging in to the Cisco MSE account for future network admin configurations.

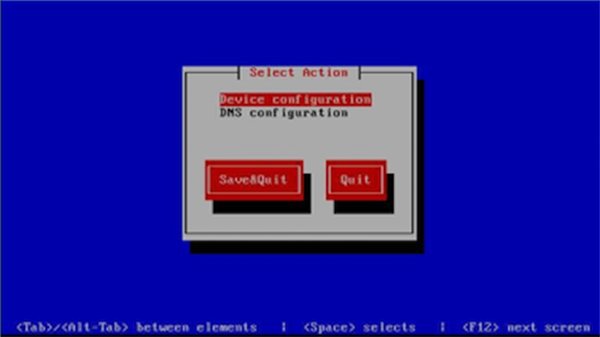
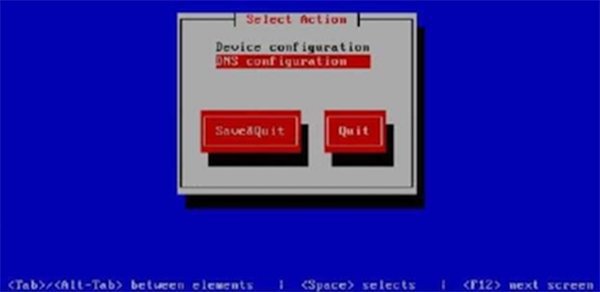
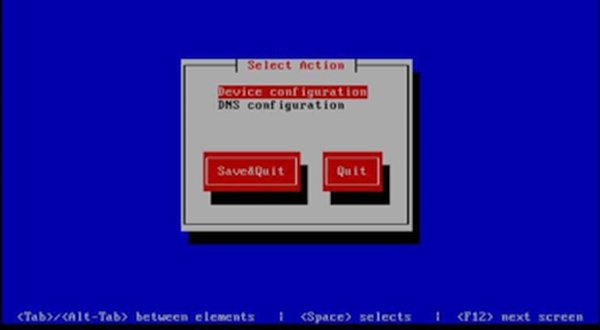
- In the Select Action window, click Device configuration
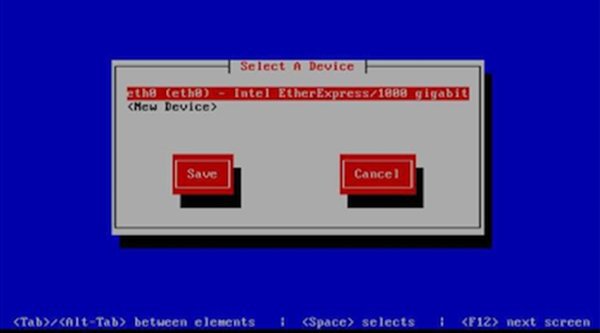
- In the Select A Device window, click the eth0 interface
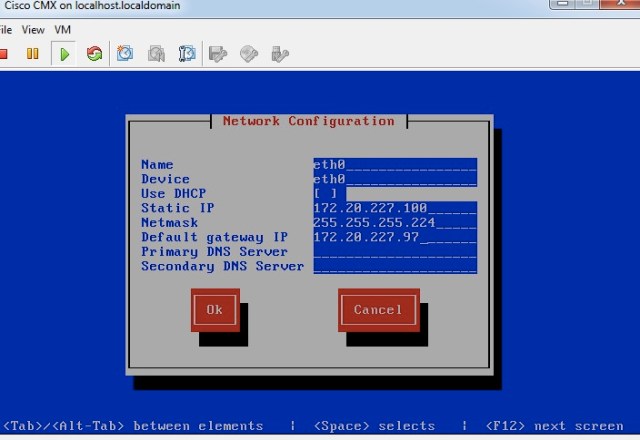
- In the Network Configuration window, enter the Name of the host, name of the Device, Static IP address, Netmask, and Default gateway IP, and click Ok
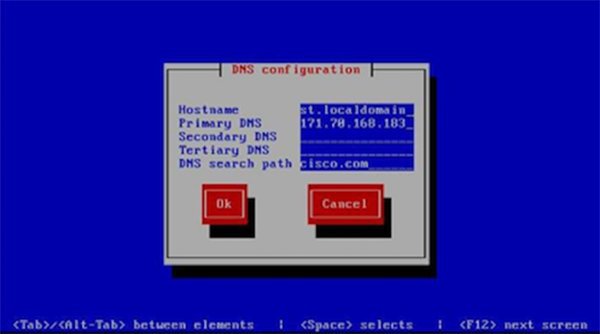
- (Optional)In the Select Action window, click DNS Configuration.
- In the DNS configuration window, enter the Hostname, DNS, and DNS search path default domain
- In the Select Action window, click Save&Quit.
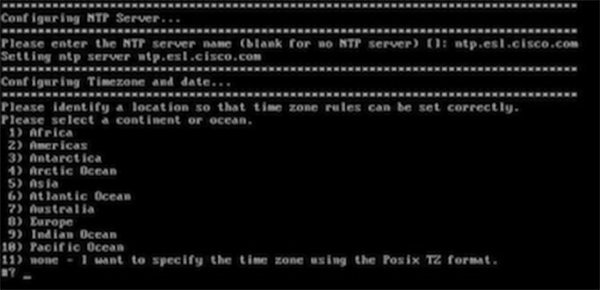
- (Recommended) Enter the NTP server name or the IP address of the NTP server when prompted.
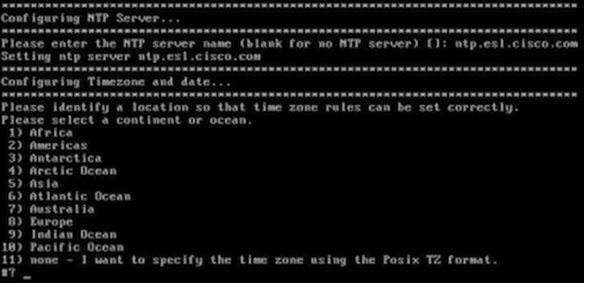
- Configure the time zone and save the changes
- Access the URL when prompted

- Open the URL http://<ip-address>:1984 when prompted in the browser. The Cisco Mobility Services Installation sign in page is displayed.
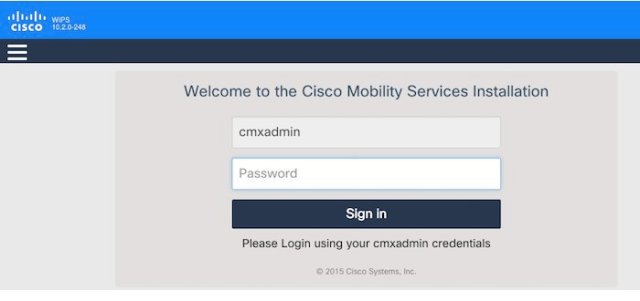
- In the Cisco Mobility Services Installation sign in page, enter your cmxadmin credentials and proceed with the installation
Installing Cisco CMX Using Web Interface
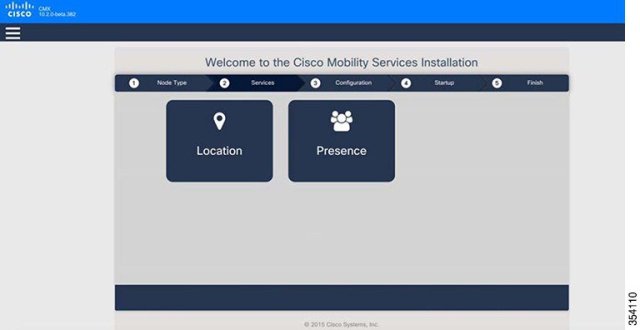
You will need to decide if you wish to setup CMX in the Location or Presence Configuration, if you change your mind at a later stage you need to start over.
If you choose Location, you will see the following services in Cisco CMX GUI:
- DETECT & LOCATE
- ANALYTICS
- CONNECT & ENGAGE
- MANAGE
- SYSTEM
If you choose Presence, you will see the following services in Cisco CMX GUI:
- PRESENCE ANALYTICS
- CONNECT & ENGAGE
- MANAGE
- SYSTEM
So now you have decided which type of CMX box you would like launch the Cisco CMX user interface using Google Chrome 40 or later, and follow these steps:
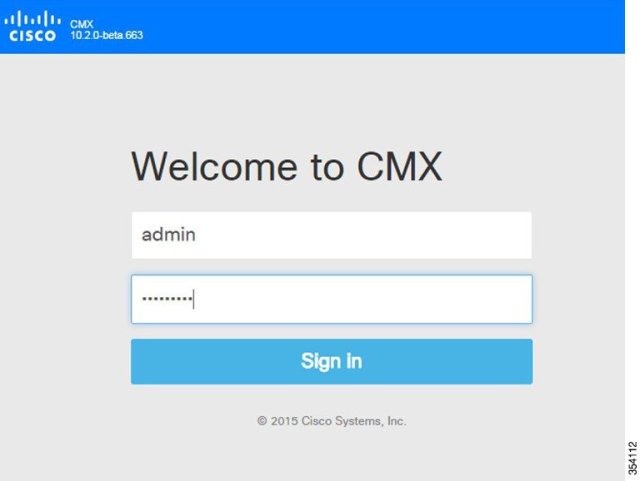
- In the Cisco CMX web interface, enter the login credentials for a Cisco CMX administrator and click Sign in to continue.The login username is cmxadmin. Use the password that was configured when the system was started for the first time
- Choose the Cisco CMX type as either Location or Presence
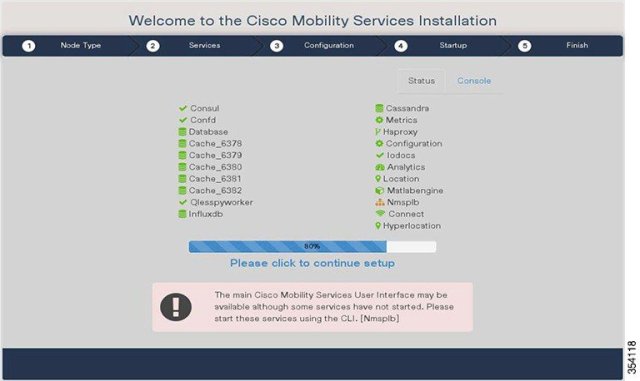
- Click Please click to continue setup or press Enter to proceed to the main portal.
- Log in with the username admin and password admin.
CMX is now installed. In a future Posts I will detail how to configure CMX for Location and Presence.

Pingback: CMX into AWS – THE WLAN
Pingback: CMX to Splunk Connector – THE WLAN
Pingback: CMX High Availability – THE WLAN