
Not long ago I posted about the CMX to Elasticsearch connector that Cisco had released, I have also been able to beta test the CMX to Splunk connector. The steps below show how to configure this connector.
I have found both the provided instructions from Cisco and also the usability of Splunk much better than Elasticsearch, but this might be due to my limited knowledge of both these products.
The below post will run you through how to configure this connector.
Prerequisites:
- Working installation of CMX 10.2.2 or later (Check out this Post for how to install CMX)
- Working installation of SPLUNK 6.4.2 or later (Check out this Post for how to install Splunk)
- Open data ports to allow for REST traffic to pass between the two systems (i.e. Port 8280)
How to Configure the Connector:
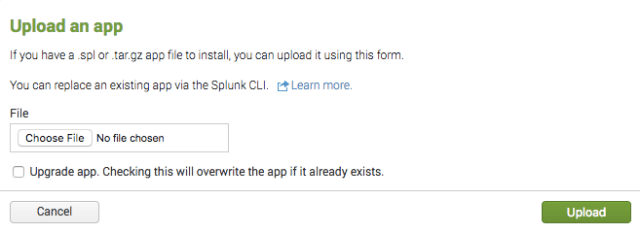
Install TA-CMX.SPL file on to Splunk
Using the SPLUNK -> APP -> INSTALL APP FROM FILE

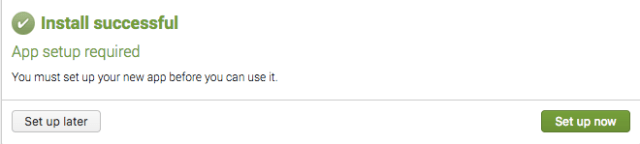
Install the CMX.APL – This contains the visualizations (same process as above)
Setup TA-CMX.APL – Point to CMX 10.2.2 instance
You need the IP address, and a USERNAME and PASSWORD for the CMX 10.2.2 instance that can read data.
Make sure that the PORT you use matches the PORT number used in the Northbound Notification. (example 8280 below)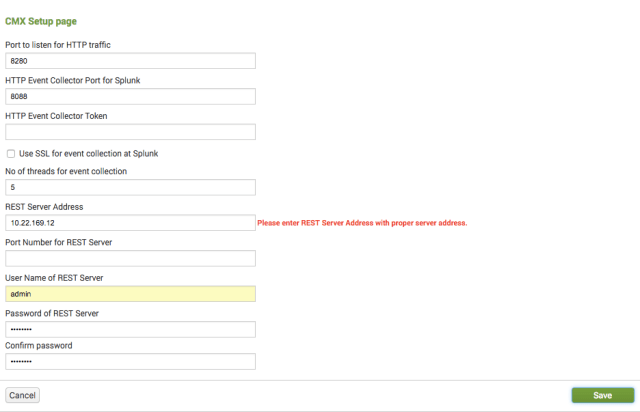
I recieved an the error “Please enter REST Server Address with proper server address” for any IP address in the 10.x.x.x range so I had to put a dummy address in 11.11.11.11 and then edit the cmxsetup.conf file on the Splunk server using the following command:
$cd /opt/splunk/etc/apps/TA-CMX/local
$vi cmxsetup.conf
[root@corp-cmx02-v20 local]# cd /opt/splunk/etc/apps/TA-CMX/local
[root@corp-cmx02-v20 local]# cat cmxsetup.conf
[setupentity]
HTTPECKEY = 64F194B7-FACC-49AC-9163-A967BFF42900
HTTPECPORT = 8280
HTTPSPEC = 8088
NOOFTHREADS = 5
PASSWORD = password
RESTSERVER = 10.x.x.x
USERNAME = admin
NOTE: I have raised this with the Cisco CMX BU and are waiting for proper solution where the Splunk App just works.
I discovered when I had a TAC case that the setup.xml file was not correct to see what was missing I looked at the file
$cat /opt/splunk/etc/apps/TA-CMX/default/setup.xml
The following Line in the file didn’t allow the second number of the first octet of the IP address for CMX to be a zero.
var ipRegex = /^(25[0-5]|2[0-4][0-9]|[1]?[1-9][1-9]?)\.(25[0-5]|2[0-4][0-9]|[01]?[0-9][0-9]?)\.(25[0-5]|2[0-4][0-9]|[01]?[0-9][0-9]?)\.(25[0-5]|2[0-4][0-9]|[01]?[0-9][0-9]?)$/;
This has been notified to the Cisco BU who have advised this will be fixed in future releases.
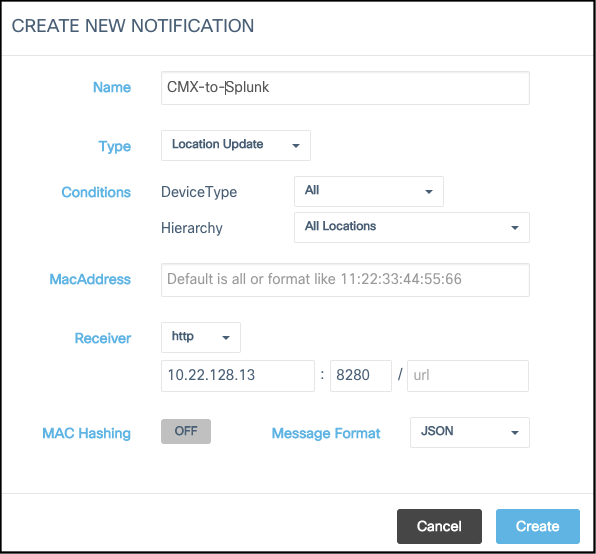
Create a Northbound Notification for SPLUNK on CMX for Location Updates
Make sure you have selected JSON as Message Format.
Make sure that the port use use matches the port specified above (i.e. Port 8280)
Enjoy your new CMX Connector for SPLUNK with 8 native SPLUNK REPORTS.
Types of reports that come with this connector are:
Two of the reports are still not working – and as its Diwali the developers are on leave this week, so I will update when I get them working, but overall I have found this connector very useful as getting the data out of CMX to a system where I can bring other datasources into to run cross referenced reports based on the CMX data will be very useful.
NOTE: use of this data should be clarified to insure that it does not breach any privacy legislations
Update: The CMX to splunk connector is now available for download from Splunkbase
